My grandmother called me the other day with a computer problem. She's fairly computer-savvy for a grandma, so when she has a problem, it's usually something that's actually wrong with the computer. This time, it was hardware. The computer wouldn't turn on. I told her over the phone that it was probably the power supply but could also be the motherboard, and I went to check it out that evening.
The piece of equipment I used to test her computer was an especially useful piece that I picked up at the Circuit City going-out-of-business corporate selloff a few years ago. Their headquarters was here in Richmond, so I made multiple trips to raid their offices when they were liquidating all of their assets. I had stuffed a backpack full of cables and sundries, including this power supply tester, and gotten it for next to nothing. If memory serves, I paid the going rate for the Swiss Army bag ($20-25) and an extra $5 for all of the stuff in it. I had no idea what the thing was worth, but it looks like you can get one pretty cheap as well ($9 shipped on Overstock).

It is worth noting that a specialty power supply tester is helpful but not entirely necessary. The standard ATX pinout is available all over the web, which means you can test everything with a multimeter. If you should decide to go that route (or need to in a pinch), here is one from smpspowersupply.com, copied for your convenience.

That process is long and tedious, though. The ATX power supply tester was done in a matter a second or two, with no ambiguity and no need to re-check. The +5V LED didn't light up, and that meant that the +5V line on the power supply was dead. Just to be sure, since I had never used this junk-sale tester before, I checked the tester on a known working power supply, and all of the lights did indeed work. We were off to Best Buy to get the required hardware.
As usual, it would be cheaper to buy the same power supply online. There's a lot to be said for downtime, though, as well as the return process with a brick-and-mortar store vs. online. I did not have a working ATX power supply (the rig used to test the tester was an old Gateway, which didn't fit the form factor), so we spent the extra $25 to have the new power supply within an hour rather than a week.

This is the power supply we ended up getting. The salesman upsold us from the house brand, and I let him because, as I mentioned in the Heatsink Fan post, I've heard good things from people I trust about Thermaltake, so I was easily sold.


The above two images show the slight difference between the standard and aftermarket PSU. The Thermaltake unit (black) is standard ATX, while the HP unit is slightly shorter and made specifically to fit in HP's proprietary cases. I was relieved to find that the new PSU did in fact fit, as I had been through this nightmare years ago with a Pavillion with a nonstandard PSU form factor and thus had to replace the entire case. The one minor fitment issue is shown in the second photo. A clip built into the case to secondarily secure the PSU is no longer helpful, so the new supply is held in only by the four screws that are standard for ATX.


Manufacturers do weird things sometimes. In this case, a computer with only SATA drives and ports was built with a power supply for IDE drives. This was likely done to use up old power supplies, and it poses no problems for the new supply, which natively supports both SATA and IDE. Now I have some spare adapters for future projects.
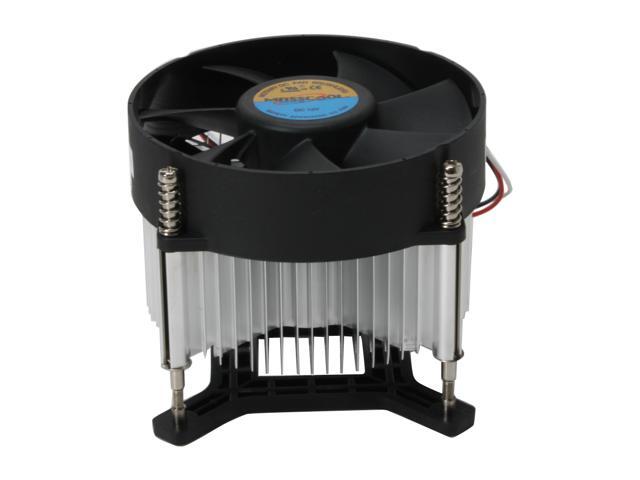
Before I put the computer back together, I wanted to do a little cleaning up. This computer is about three years old, so there was a decent amount of dust build-up on the processor heatsink. Unlike my fileserver, this processor socket (Pentium dual-core of some sort) has what I feel is a proper heatsink mount. The heatsink attaches to the motherboard with a clamp, and the fan is held to the heatsink with four screws. This makes it easy to remove the fan for cleaning without disturbing the thermal connection between the processor and the heatsink.

Dusty heatsink. With everything unplugged, I just cleaned it out with a vacuum (no attachment). There's not really anything tricky to this, so I won't elaborate. This is just a good, simple step to take whenever you open up your computer to ensure processor longevity.
I hooked everything up, then turned on the power supply. Aftermarket power supplies usually have a separate power switch that the stock units don't have, and this one is no exception. It sounds like a dumb thing to mention, but sometimes intelligent people will neglect the simple details. Make sure the power switch is turned to 'on' (the international symbol is a line, to resemble a 1) after hooking everything up, before booting up. The operation was a success, and now Grandma can resume sending me videos of dancing dogs.