Pages

June 18, 2012

Headlamp Replacement - '99 Malibu and '95 Saturn SL

It's a simple fact of life that, if you own a car long enough and drive it year-round, you will end up with a pair of hazy headlamps, and if your mechanic is any good (and cares about your life and his license), he'll tell you that you have to replace or restore them before you can pass inspection.

Saturn SL2

I find the latter option to be a waste of money. I tried a headlight restoration kit on my Saturn about two years ago, and it seemed to work well at first. After about an hour of sanding, scrubbing, and polishing my headlights, I was able to present my favorite shop with something they could allow me to keep driving. The lenses looked almost brand-new. There was a faint line where the original glossy finish (which is next to impossible to remove on purpose) ended, but the lenses were plenty clear to pass state inspection. A year later, I had to do the same thing again because the finish from the polishing kit had worn off, and a couple of months after that, the haze was back. This was all done with a kit that came well-recommended. I had had enough of it, and I was not interested in trying a bunch of different polishing kits.
The hunt was on for a pair of affordable headlamps. Parts stores wanted at least $80 apiece for new ones, so I was going to have to hunt elsewhere. eBay has some available for $35, but I needed to make a trip to the junkyard anyway, so I thought I would try there before I bought anything online. Most of the cars in the yard had the same hazy headlamp issue, but one former owner had bothered to replace them within the last few years with a nice fresh pair. I snagged them for about $20 apiece plus tax.
Removing and installing headlamps in a Saturn S-series is one of the simplest things you can do to a car. They're held in with three bolts with 10mm heads: two right on top where you would expect them, and one down below, also easy to access. The procedure takes about eight seconds. Simply remove the bolts, twist the bulbs out, and reverse the procedure for the new lamps. If you like, you can unclip the bulbs instead and use the ones from your new set (if equipped). The signal bulb has the connector twist into the housing, then the bulb clips into the connector. Either way, you'll now have a few spares, which might come in handy if a police officer tries to write you a ticket for a burned-out bulb before you notice it.
Comparison shot before the swap.
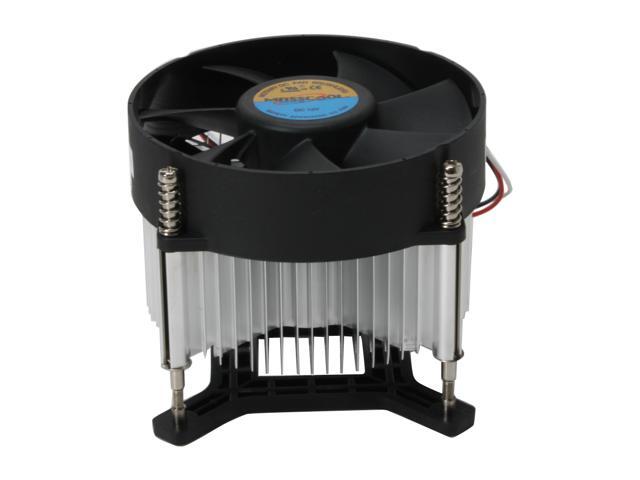
The socket is on the lower mounting bolt. Top mounting bolts are also visible here.

Aiming these headlamps can be a bit trickier than installation. On my car, both the old set and the new were aimed low and cross-eyed. Ideally, the left headlamp should be aimed straight ahead and down slightly (to avoid blinding oncoming traffic), and the right should be aimed dead forward. The vertical adjustment is intuitive. There is a torx head at the top-center of the headlamp. Tighten it (turn right) to raise, loosen to lower the aim. The horizontal adjustment is a littler trickier. Toward the outer edge, behind the headlamp, there is a plastic adjustment wheel that looks like a gear. In my case, this was a very stubborn piece to move. Stick a flat-tipped screwdriver on the appropriate end and tap it with a hammer to make the adjustment. The way it works is, the adjustment wheel is stationary on the light, and it turns a screw that connects it to the mounting bracket. Since it's on the outside edge, screwing it into the bracket pulls the outside of the lamp in and moves the adjustment outward. Thus, tapping on the outside of either adjustment wheel will move the light to the driver side, and tapping on the inside will move it to passenger. Adjust accordingly.

Chevrolet Malibu


I thought that replacing the headlamps on my Saturn was as simple as it could get. I was wrong. The headlamps on this 1999 Malibu that I acquired can be changed without using any tools. The two plastic clips on the back of each headlamp pop up to release the lamp from the mount. This can all be done with bare fingers. There may be a rubber flap bolted to the frame rail, that somewhat obscures the clips. It can still be done without tools, but you might find it easier to remove it. As with the Saturn, the bolts have 10mm heads.
The price was also more attractive on the Malibu lamps. A cheap pair made in China can be had off of RockAuto.com for $25.89 plus shipping. Fitment is slightly off, but the rubber gaskets around the lamp still seal with the body. The light pattern is indistinguishable from stock, and, of course, output is much better with clear lenses. I have not adjusted these yet, as the car is not driveable, but I will update later with proper instructions.
Here, you can see the two plastic mounting clips. One is at the top of the picture.
The other is a little difficult to make out, a little below the middle.
Here, you can see the mounting points to which the plastic clips attach.

January 26, 2012

HP Pavilion Power Supply

My grandmother called me the other day with a computer problem. She's fairly computer-savvy for a grandma, so when she has a problem, it's usually something that's actually wrong with the computer. This time, it was hardware. The computer wouldn't turn on. I told her over the phone that it was probably the power supply but could also be the motherboard, and I went to check it out that evening.
The piece of equipment I used to test her computer was an especially useful piece that I picked up at the Circuit City going-out-of-business corporate selloff a few years ago. Their headquarters was here in Richmond, so I made multiple trips to raid their offices when they were liquidating all of their assets. I had stuffed a backpack full of cables and sundries, including this power supply tester, and gotten it for next to nothing. If memory serves, I paid the going rate for the Swiss Army bag ($20-25) and an extra $5 for all of the stuff in it. I had no idea what the thing was worth, but it looks like you can get one pretty cheap as well ($9 shipped on Overstock).
It is worth noting that a specialty power supply tester is helpful but not entirely necessary. The standard ATX pinout is available all over the web, which means you can test everything with a multimeter. If you should decide to go that route (or need to in a pinch), here is one from smpspowersupply.com, copied for your convenience.
That process is long and tedious, though. The ATX power supply tester was done in a matter a second or two, with no ambiguity and no need to re-check. The +5V LED didn't light up, and that meant that the +5V line on the power supply was dead. Just to be sure, since I had never used this junk-sale tester before, I checked the tester on a known working power supply, and all of the lights did indeed work. We were off to Best Buy to get the required hardware.
As usual, it would be cheaper to buy the same power supply online. There's a lot to be said for downtime, though, as well as the return process with a brick-and-mortar store vs. online. I did not have a working ATX power supply (the rig used to test the tester was an old Gateway, which didn't fit the form factor), so we spent the extra $25 to have the new power supply within an hour rather than a week.
This is the power supply we ended up getting. The salesman upsold us from the house brand, and I let him because, as I mentioned in the Heatsink Fan post, I've heard good things from people I trust about Thermaltake, so I was easily sold.
The above two images show the slight difference between the standard and aftermarket PSU. The Thermaltake unit (black) is standard ATX, while the HP unit is slightly shorter and made specifically to fit in HP's proprietary cases. I was relieved to find that the new PSU did in fact fit, as I had been through this nightmare years ago with a Pavillion with a nonstandard PSU form factor and thus had to replace the entire case. The one minor fitment issue is shown in the second photo. A clip built into the case to secondarily secure the PSU is no longer helpful, so the new supply is held in only by the four screws that are standard for ATX.
Manufacturers do weird things sometimes. In this case, a computer with only SATA drives and ports was built with a power supply for IDE drives. This was likely done to use up old power supplies, and it poses no problems for the new supply, which natively supports both SATA and IDE. Now I have some spare adapters for future projects.
Before I put the computer back together, I wanted to do a little cleaning up. This computer is about three years old, so there was a decent amount of dust build-up on the processor heatsink. Unlike my fileserver, this processor socket (Pentium dual-core of some sort) has what I feel is a proper heatsink mount. The heatsink attaches to the motherboard with a clamp, and the fan is held to the heatsink with four screws. This makes it easy to remove the fan for cleaning without disturbing the thermal connection between the processor and the heatsink.
Dusty heatsink. With everything unplugged, I just cleaned it out with a vacuum (no attachment). There's not really anything tricky to this, so I won't elaborate. This is just a good, simple step to take whenever you open up your computer to ensure processor longevity.
I hooked everything up, then turned on the power supply. Aftermarket power supplies usually have a separate power switch that the stock units don't have, and this one is no exception. It sounds like a dumb thing to mention, but sometimes intelligent people will neglect the simple details. Make sure the power switch is turned to 'on' (the international symbol is a line, to resemble a 1) after hooking everything up, before booting up. The operation was a success, and now Grandma can resume sending me videos of dancing dogs.

January 24, 2012

Heatsink Fan

Last May, I decided to build a file server for my house. I got a free P4 HT processor and video card from a coworker, and I bought a motherboard, RAM, heatsink, thermal compound, and hard drive for it off of Newegg. I used an old case, power supply, disk drive monitor, keyboard, and mouse that I had lying around, and I hooked it up to my stereo for audio so it could also serve as a jukebox for the house. I loaded Ubuntu Linux on it, so there's no software cost other than the cost of the CD-ROM that I used to create the installation disk. All told, the thing cost me around $180. Not bad for a 2TB network drive that's also a fully functional spare computer.
Clearly, I was pretty frugal with parts. I got the cheapest heatsink for my application, and not the most expensive RAM (though I did max out the board). The hard drive I wanted was on sale for $75, which was one of the motivators for doing the project when I did. Here is the Newegg product image for the heatsink we're dealing with.


I was happy with my purchase overall, until the rig started making unwanted noise. I was busy with school, so I didn't really have time to diagnose and troubleshoot. Today, I finally got around to fixing it. The culprit was the fan that came with the heatsink. The "long life" bearing had gone bad, and the cooling fan only worked intermittently. When it did work, it made a horrible rattling sound.
I needed a quick solution. I didn't want to wait for shipping. I had time today, and that's when I wanted to fix it. I visited Radio Shack to see if they had any solutions. The stock fan was 90mm, but the mounting holes were spaced the same as a standard 80mm fan, which they had in stock. The one brand they carried in that size was Thermaltake, and the price was $11. I had heard good things about their products, so I was sold.
The Thermaltake fan had just one problem: it was a case fan. For some applications, that's not a problem. In my case (LGA 775), however, there was a fitment issue. Case fans have mounting holes on both sides, which normally allows them to be mounted in a variety of ways. The same fan can be used for either intake or exhaust in any given position. The way this bad boy mounts, the rear mounting tabs get in the way, so I had to go after them with a hacksaw. Here is the result.
As noted in the comments, I mounted the fan upside-down. This is not optimal,
but it still works well enough for my lightly-overclocked application.
Learn from my mistake. Measure twice, cut once.
As you can see, I just cut the corners off of the outward-facing side. I used the screws off old fan, which were a little tricky to get out of the old fan. They were retained by a sort of locking collar. Wire snips would have been ideal for removing them, but they had gone missing, so I instead used a pair of needle-nose pliers to twist and break the collars off. Everything went together without a problem. I'm pretty sure the collars were on the screws just as a weak deterrent to keep consumers from doing exactly what I did. Here is a blurry close-up of three of the broken collars (one to be found later in an inconvenient way, no doubt), to give you an idea of what I was working with.
The new fan works like a dream. The blue LEDs work well as a night light so I can find my way to the lamp. The smaller fan turns at a slightly lower speed than the original (2000 RPM vs. 2400), so it's quieter, but it blows well enough that I can still overclock the processor because the heatsink is huge and doesn't need much airflow. I pronounce this operation a success, and I recommend it for anyone in a similar pinch.